This post may contain references to products from one or more of our advertisers. Oh Sweet Basil may receive compensation when you click on links to such products.
Fluffy Ukrainian pancakes, or oladi, are crispy around the edges and soft and delicious in the middle. Here’s a surprise for you, these pancakes are made with yeast! But don’t worry, they are as easy as a quick bread! In fact, they are my new favorite breakfast recipe!

Table of Contents
- What is Oladi?
- What Do I Need to Make Ukrainian Pancakes?
- Natasha’s Kitchen
- How to Make Oladi
- Tips and Tricks for the Best Oladi
- How to Serve Ukrainian Pancakes
- What to Eat with Ukrainian Pancakes
- Can Oladi Be Made Ahead?
- Storage Tips
- More Pancake Recipes to Enjoy
- How to Make Oladi Ukrainian Pancakes Video
- Baba’s Fluffy Oladi Pancakes (Ukrainian) Recipe
Our buttermilk pancake recipe is one of the most popular on the blog, and they are to die for, but these Ukrainian pancakes have stolen my heart and tastebuds!
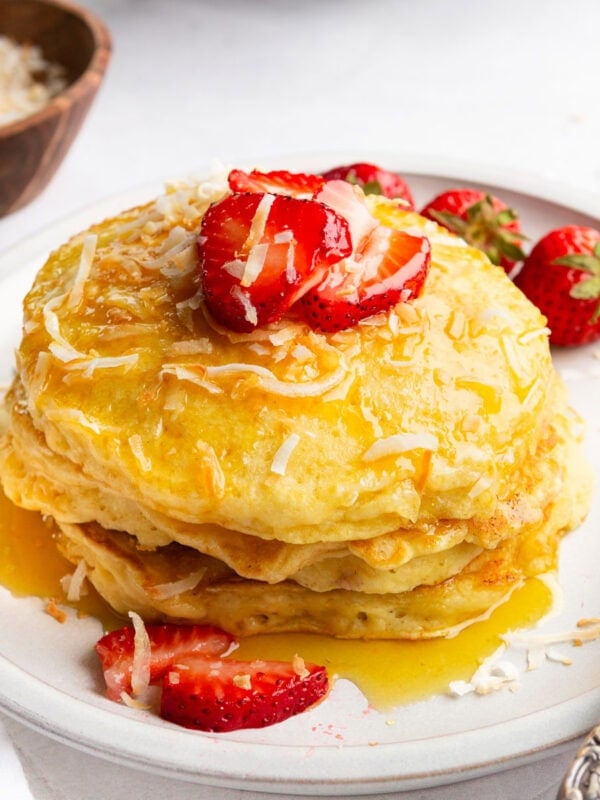
These yeasted pancakes are cooked in a pan with a little more oil than traditional American pancakes so they get almost fried crispy edges. Mmmm and that hint of sourdough, gosh it’s good! They are almost fritter-like on the outside but takes like pancakes in the middle. Seriously, where have these Ukrainian pancakes been my whole life?? I need to explore more Ukrainian food!

What is Oladi?
Oladi is a type of pancake that originates in Ukraine and Russia. They are traditionally made with kefir, a fermented milk made from kefir grains common in the area. For this recipe, we will use buttermilk, but feel free to use kefir if you want to! They are pan fried in a little oil and usually served with sour cream and a fruit jam.
Oladi is not to be confused the Russian pancakes called blini. Those are usually served with savory toppings like caviar and salmon. Oladi can be served with savory toppings but are usually served as a sweet breakfast.

What Do I Need to Make Ukrainian Pancakes?
I know, you hear “Ukrainian pancakes” and you think it’s going to call for ingredients that are out of the norm. Well, I have the best news ever! This pancake recipe is made with pantry staples! So you can probably head to the kitchen right now and start whipping up a batch of oladi. Here is everything you need:
- Water: the warm water helps activate the yeast
- Buttermilk: adds flavor and rise to the pancakes
- Egg: should be at room temperature and helps binds all the ingredients together
- Extra-light Olive Oil: adds a little fat to the pancake batter, and then we will use a little more of it to fry the pancakes. Vegetable oil is a great substitute.
- Sugar: adds just a touch of sweetness
- Instant Yeast: makes the pancakes so fluffy
- Fine Sea Salt: enhances all the flavors
- All-Purpose Flour: gives the pancakes structure
This is meant to just be an overview of the ingredients. For measurements and all the details, please scroll down to the recipe card at the end of the post.

Natasha’s Kitchen
My darling friend Natasha released her cookbook, Natasha’s Kitchen last year and I couldn’t wait to dive in. Natasha’s recipes are timeless, simple and powerfully delicious. That is the key to finding a successful cookbook, one that is true to its potential. My friend has been real since day one as is her food. There are no pretenses, no “instagram food” that looks gooey, beautiful or succulent but under delivers on flavor. No, these recipes are the ones that will not only be loved in your home but thanks to their accessible ingredients they will quickly become staples.
A few of my favorites:
Oladi Pancakes
California BLT Salad
Coconut Chicken Strips
Now, let’s get back to the recipe!
How to Make Oladi
Because this pancake batter has yeast in it, it will need to time to rest and rise. So plan your breakfast schedule accordingly!
- Make the Batter: Whisk together all the ingredients except the flour and add the flour a little at a time making sure everything is incorporated. It will be a thin, cake batter consistency.
- PRO TIP: If you want to add anything to the batter like raisins, craisins, or small apple bits, now would be the time to add them to the batter.
- Let the Batter Rest: Cover the bowl with plastic wrap and let the batter rise until it has almost doubled in size. The batter will be very bubbly (see photo below).
- Cook the Pancakes: Once the batter has risen, pour enough oil into a cast-iron skillet or large skillet (nonstick) to coat the bottom of the pan. Add heaping tablespoons of batter to the hot skillet and cook until golden then flip. Add more oil as needed and don’t overcrowd the pan.
- Serve and Add Toppings: Serve everyone a few pancakes and let them add their favorite toppings!
All of these instructions can be found in full detail in the recipe card down below.

Tips and Tricks for the Best Oladi
- Before cooking, let the batter rest and rise in order to get that fluffy delicious texture. Don’t skip this step!
- The oil that you cook the pancakes in is crucial to getting the right outcome. Make sure you add more oil as you go so that each batch is cooked evenly.
- Use a cookie scoop (I used the largest size scoop from this pack) to drop the batter into the pan. If you have problems with the batter sticking, you can spray the cookie scoop with cooking spray between scoops. A great tip is to keep a hot glass of water nearby and dip your cookie scoop or spoon into it before each scoop so that the batter will slide right out. I’ll be trying that technique the next time I make this recipe!
- Keep these pancakes quite small. They aren’t going to be giant like traditional buttermilk pancakes can be. If they get too big, they won’t cook all the way through and will be doughy in the middle. They should be about the circumference of a baseball.

How to Serve Ukrainian Pancakes
Although I mentioned above that Oladi is traditionally served with sour cream and fruit jam you can top it with whatever your family loves. Here a few more ideas:
- Honey
- Real Maple Syrup
- Nutella
- Chocolate Chips
- Peanut Butter
- Buttermilk Syrup
- Fresh Berries
- Sliced Bananas
- Chopped Nuts

What to Eat with Ukrainian Pancakes
If you are looking to add some protein to this breakfast recipe, these pancakes go great with a side of bacon, scrambled eggs, or sausage! My kids love oladi as a breakfast for dinner option too with a simple side dish and glass of chocolate milk or orange juice! It’s a dinner hit every time!

Can Oladi Be Made Ahead?
Yes, this is a great make ahead pancake recipe! You can make the whole batter and store it in the fridge for up to 2-3 days, or you can make the pancakes ahead. Afterwards, reheat the cooked pancakes in the microwave or toaster. I personally recommend the toaster so you keep those crispy edges!

Storage Tips
If you end up with leftover oladi, let them cool to room temperature and then store them in a ziplock bag in the refrigerator. They will keep for 2-3 days.
These pancakes also freeze really well. Store them in a ziplock bag or freezer safe container. They will keep for up to 3 months.
To reheat these pancakes, use the microwave or the toaster. The toaster is my preferred method for reheating.

Experience a taste of Ukraine with these traditional Oladi pancakes, passed down through generations and thankfully into my kitchen! Fluffy and delicious, these pancakes are perfect for breakfast or as a snack.
More Pancake Recipes to Enjoy
- Dutch Baby Pancakes
- Sour Cream Pancakes
- Swedish Pancakes
- Japanese Cloud Pancakes
- Finnish Pancakes
- Buttermilk Pancakes
- Cottage Cheese Pancakes
- Gluten Free Pancakes
How to Make Oladi Ukrainian Pancakes Video
Baba’s Fluffy Oladi Pancakes (Ukrainian)

Ingredients
- 1 Cup Water, warmed to 115°F
- 1 Cup Buttermilk
- 1 Large Egg, room temperature
- 2 Tablespoons Extra-light Olive Oil, or vegetable oil, plus more for the pan
- 2 Tablespoons Sugar
- 1 1/2 teaspoons Instant Yeast
- 1 1/4 teaspoons Fine Sea Salt
- 2 3/4 Cups All-Purpose Flour
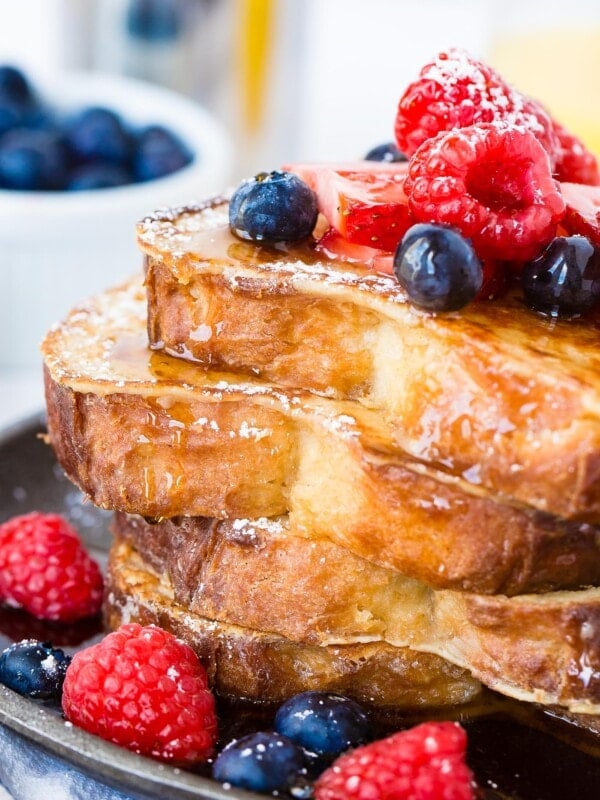
- Honey, Real Maple Syrup, Raspberry Sauce or Jam
- Sour Cream
Instructions
- In a large bowl, whisk together the water, buttermilk, egg, oil, sugar, yeast, and salt.1 Cup Water, 1 Cup Buttermilk , 1 Large Egg, 2 Tablespoons Extra-light Olive Oil, 2 Tablespoons Sugar , 1 1/2 teaspoons Instant Yeast , 1 1/4 teaspoons Fine Sea Salt
- Add the flour, 1 cup at a time, whisking to incorporate each addition before adding more. Continue whisking until the batter is smooth with a thin cake-batter consistency.2 3/4 Cups All-Purpose Flour
- Cover the bowl with plastic wrap and let the batter rise at room temperature for 1½ to 2 hours or in a warm place (about 100°F) for 1 hour. The mixture should become very bubbly and almost double in size.
- In a large nonstick or cast-iron skillet over medium heat, add enough oil to coat the bottom of the pan. Working in batches, add heaping tablespoons of the batter to the hot skillet, spacing them just far enough apart that they aren't touching and can still be flipped easily.
- Cook the pancakes for about 1½ minutes per side, until golden brown, adding more oil as needed after flipping. Feel free to reduce the heat if you find they're browning too quickly.
- Continue with the remaining batter, keeping the skillet well-oiled between batches to ensure crisp, tasty, and beautifully golden edges on the pancakes.
- Transfer the pancakes to a platter and serve warm with honey, raspberry sauce, and sour cream.Honey, Real Maple Syrup, Raspberry Sauce or Jam, Sour Cream
Recipe Notes
Nutrition
Nutrition information is automatically calculated, so should only be used as an approximation.

Perfect
Thank you Theodore!
EXCELLENT! So tasty! I tried different toppings to see what I would like best….. cookie butter, syrup, fresh made blueberry compote or plain Greek yogurt. Our favorite was a combination of the Greek yogurt and blueberry compote!!! So yummy!!!
That sounds amazing Kelly!! Thank you so much for the feedback!
You have clearly grabbed me with this one! My question to you is advice on 2 scenarios, based on our little family of 2 having our breakfast by 7 a.m. Would you have me prepare the batter and leave covered on the kitchen counter “overnight” before griddling….or would I be better served to make the pancakes at a leisurely time of the day and toast the next morning? Can’t wait to try this unique pancake, and thank you in advance for sharing!
Hi Jeff! You have a couple of options…you can make the batter the night before (or up to 2-3 days before) and store it in the fridge, then pull it out early in the morning to let it rise. Then you will cook as directed. The other option is to cook the pancakes a day or two beforehand and then reheat them either in the microwave or in the toaster. I prefer the toaster to keep the crispy edges!